Overview | Guide | Tech Spec | Review
Pavtube BDMagic for Mac
User Guides
Pavtube BDMagic for Mac is the Blu-ray ripper that can achieve all kinds of 3D/2D Blu-ray as well as DVD ripping, copying tasks on Mac OS X. It can help you rip and convert Blu-ray/DVD discs to any popular video formats such as MP4, MOV, AVI, WMV, FLV, MKV as well as any popular audio formats such as AAC, AC3, MP3, OGG and WAV.
Note: A BD Drive is needed for ripping or copying Blu-ray discs.
Part 1: How to backup Blu-ray disc on Mac
Part 2: How to convert Blu-ray/DVD to video/audio on Mac
Part 3: How to edit Blu-ray/DVD movies on Mac
Part 1: How to backup Blu-ray disc on Mac
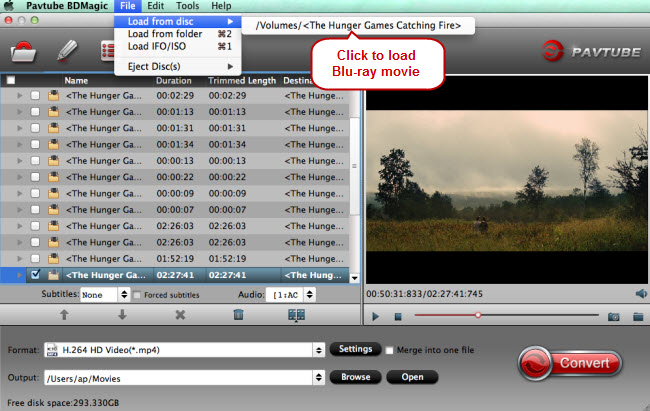
Step 1. Add Blu-ray movies
Insert the Blu-ray disc to the Blu-ray Disc drive or DVD to the DVD-ROM, then click the “Load Disc” button to load Blu-ray or DVD movies to the Mac Blu-ray Ripper. Here you can also import DVD folders, ISO files and IFO files to convert.
Step 2. Select an output folder
Specify a folder to store backed-up video files in the “Browse” field. (Note: if you are backing up a Blu-ray disc, please make sure the storage place is around or above 30GB.)
Step 3. Start to backup
Pavtube BDMagic for Mac provides users two lossless-quality copying method. One is to click “Copy the entire disc” to backup your Blu-ray or DVD discs with all original structures; The othere is choose “Copy” > “Directly Copy” to copy the .m2ts or .vob files only which contains the main movie on Blu-ray or DVD and without any other extra contents.
Part 2. How to convert Blu-ray/DVD on Mac?
1. Add Blu-ray or DVD movies
Insert the Blu-ray disc to the Blu-ray Disc drive or DVD to the DVD-ROM and click the “Load Disc” button to have movies uploaded to the program.
Tip: Once the files are loaded, you can select the subtitles and audio track you prefer. On the right windows, you can preview your files and take snapshots of your favorite movie scenes.
2. Select the output format
In the “Format” menu, choose either a video or an audio format as the output format. This Mac Blu-ray converter also has 150+ presets for almost all popular multimedia devices. You are allowed to choose one device as the output format as well.

3. Adjust video/audio Settings (Optional)
If you want to customize output video quality in further, click “Settings” button to customize video quality like resolution, frame rate, bit rate, audio channel, etc.
4. Start the conversion
Click the “Convert” button to rip Blu-ray/DVD to any video or audio format. That’s it ! You’ve made it!
Part 3: How to Edit Blu-ray/DVD files on Mac
Since Blu-ray/DVD videos are very large, to save the space on your computer or device, you may need to trim the video. To do that, you just need to click the “Edit” button and move mouse pointer to “Trim” on the main interface, and then set the start time and end time to retain the part you need. There are main other six functions available: Trim, Crop, Text Watermark, Image/Video Watermark, Effect, Audio Editor, and Subtitle.

Trim: Select video durations by setting the start time and the end time.
Crop: Cut off black edges and unwanted areas.
Text Watermarking: Add text to the video as watermarks.
Image/Video Watermarking: Add image or video to the source video as a watermark.
Effect: Adjust brightness, contrast, saturation of the video, and add special effects including 3D effect to the video.
Audio Editor: Enable you to replace the original audio track with your specified sound track. Or choose to remove the audio. Plus, it’s freely to set audio fade in or fade out.
Subtitle: Add plug-in SRT, ASS, SSA subtitle to videos.