Kodi is a popular media player that will stream a variety of media sources and assist you in watching or listening to online content. Formally known as XBMC, Kodi is a buzzword amongst fanatic binge-watchers, evoking a magical portal that opens up a seemingly endless universe of content and broadcasts it to your HDTV or laptop screen, without any restrictions, and without any payment. From Kodi supported page, we know that Kodi does handle DVD. So let’s learn how to put DVD to Kodi playlist for enjoying.
How to set up Kodi and add DVD to Kodi for playback
First of all, you will need to install Kodi from here, and then inset your DVD to optical drive, install and launch Kodi.
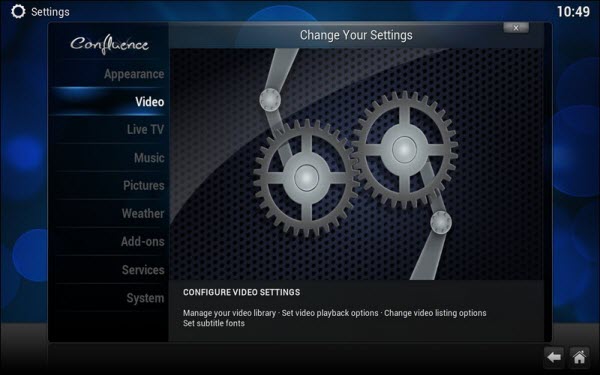
Under the “Video” category, you will find all kinds of settings for telling you how to manage and display video in Kodi.
The “Library” subcategory refers to videos that you have stored on your computer, whether they are archived from DVDs or downloaded.
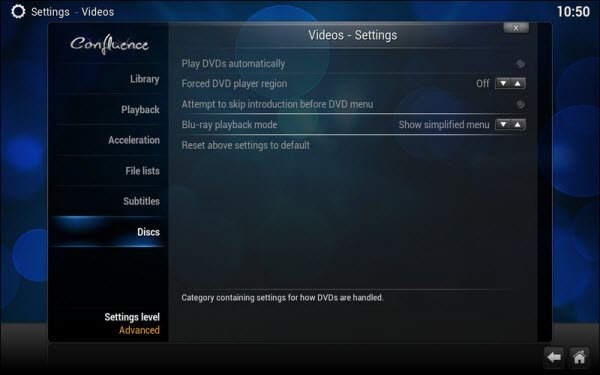
The final subcategory “Discs” allows you to control playback of both DVD and Blu-ray movie discs. You can enable the settings here that are set to off by default. If you enable the “Play DVDs automatically” setting, the DVD will begin playing automatically when you insert a DVD disc while Kodi is running. If you enable the “Attempt to skip introduction before DVD menu” setting on, Kodi will attempt to skip straight to the DVD menu, so that you can directly watch the DVD disc’s content without waiting for a long time.
How to add protected DVD to Kodi for Playback?
Although Kodi includes hardware-accelerated DVD playback capacity. The bad news is that you may still fail to get encrypted DVD movies played on Kodi.
As we know that almost all commercial DVD discs have DVD region codes and DVD copy protection, which makes it difficult to copy DVD movie content to Kodi library. So, to stream protected DVD to Kodi, you need remove the region code and copy protection from DVD and backup DVD to a digital file in Kodi supported formats list as below:
Container formats: AVI, MPEG, WMV, ASF, FLV, MKV/MKA (Matroska), QuickTime, MP4, M4A, AAC, Ogg, OGM, RealMedia RAM/RM/RV/RA/RMVB, 3gp
Video formats: MPEG-1, MPEG-2, H.263, MPEG-4 SP and ASP, MPEG-4 AVC (H.264), H.265 (as from Kodi 14) HuffYUV, MJPEG, RealVideo, RMVB, WMV
Audio formats: MIDI, AIFF, WAV/WAVE, AIFF, MP2, MP3, AAC, DTS, ALAC, AMR, FLAC, RealAudio, WMA
3D video formats: Passive 3D video formats such as SBS, TAB, anaglyph or interlaced
Then a handy DVD ripper application is needed. If you are looking for a powerful program to break all protection from all commercial DVD movies, we highly recommend Pavtube DVDAid(review) to you. This program features a powerful built-in disc decrypter, which allows you to automatically bypass all DVD copy protection and region code including Region code, RCE, key2Audio, UOP, CSS, Macrovision, FluxDVD, Protect, ARccOS, AACS, BD+, ROM Mark, BD-Live, etc. You can then rip the non copy protected data on DVD disc to Kodi playable video and audio file formats listed above.
To get output video and audio quality for Kodi, you can use this tool to flexibly adjust profile parameters such as video codec, resolution, bit rate, frame rate, audio bit rate, sample rate, channels, etc to let them fit with Kodi. Have in mind that the program run on both Windows and Mac platforms. If you are running an iMac/MacBook, please go to Pavtube DVDAid for Mac.


Guide: Rip protected DVD to Kodi for playback
Step 1: Import DVD Movies
Download, install and run this DVD ripper. You can load DVD by clicking “File” > “Load from disc”. Or load DVD Folder by clicking “File” > “Load from folder” or load DVD IFO/ISO image by clicking “File” > “Load IFO/ISO”.
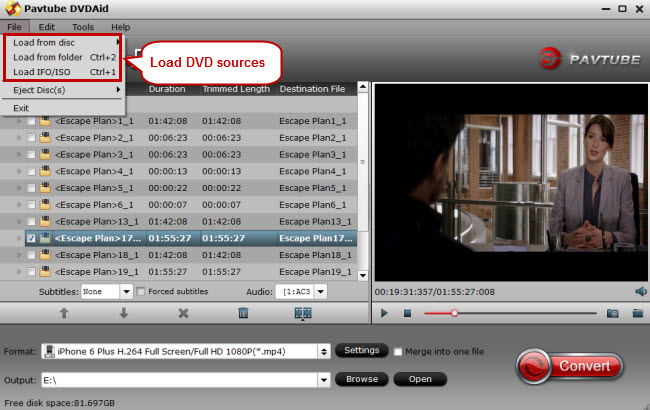
If you need to backup DVD with wanted subtitles and audio track, you can click the drop down menu after “Subtitles” and “Audio” to select your desired tracks. What’s more, it also offers an option called Forced subtitles, which enables you to see subtitles only when actors are speaking a different language.
Step 2: Output best playback format for Kodi
Click “Format” bar, from its drop-down option, select to output Kodi best playable video formats by following “HD Video” > “H.264 HD Video(*.mp4)”. To keep losssless image quality, you can choose to copy DVD to lossless MKV.
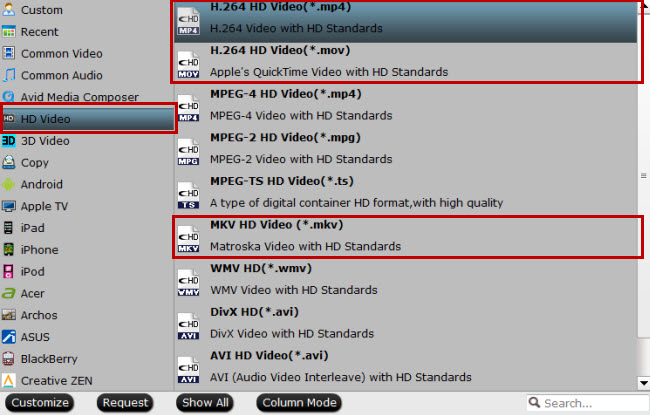
Tip: Click “Settings” to open “Profile settings" window, in “Audio” section, click “Codec” drop-down list, select Kodi playable AAC or MP3 codec to output, you can also change other settings according to your own needs.
Step 3: Start DVD to Kodi conversion
After all setting is completed, hit the “Convert” button at the right bottom of the main interface to begin the ripping process from DVD movies to Kodi playable file formats.
When the conversion is finished, click “Open Output Folder” icon on the main interface to open the folder with generated files. Then feel free to install and setup Kodi on your computer and add the converted files to Kodi for playback without any limitation.