This article offers a great solution about how to quickly recover lost, corrupted or deleted iPhone data from iTunes Backup or without iTunes by a top iPhone Data Recovery.
Data lost on iPhone is very normal. Search online i found many iPhone users asked how to recover their lost or deleted contacts, notes, message, voice memos, call history, etc. Here are several common situations that will lead to iPhone data lost.
- Accidental deletion of contacts, messages, notes, etc.
- iPhone is water damaged, broken or has suffered other physical damage
- Factory resetting or system restore.
- Failed upgrade iOS or Jailbreak
How to get iPhone lost or deleted data back? Pavtube iOS Data Recovery (or get a Mac version) provides the best solution for all iPhone user (including iPhone 5S, iPhone 5C, iPhone 5, iPhone 4S, iPhone 4, iPhone 3G, iPhone), it is a easy-to-use and professional iPhone Data Recovery software designed for recovering iPhone data. It can effectively and quickly restore lost, deleted, corrupted, stolen data from iPhone, including photos, videos, contacts, message, calendar, notes, reminders, etc.
As long as your iPhone has been synced with iTunes before the data lost, this powerful software could recover all of the lost data on iPhone with ease no matter how much. If you don’t have any backup files, Don’t worry! You can also directly retrieve lost data from iPhone. With simple steps, you can get your iPhone lost data back at any time you want. Following is two simple guides show you how to quickly recover iPhone lost data.
Free download the best iPhone Data Recovery for Windows or Mac and have a try!
How to quickly recover lost data on iPhone from iTunes Backup or without iTunes?
Guide 1: Retrieve iPhone lost data from iTunes backup
Step 1: Choose an iPhone backup file and start to scan.
Install and run iPhone Data Recovery, Choose “Recover from iTunes Backup”, then select the latest iPhone backup file, click “Start to Scan”.

Step 2: Preview & Select which files you want to recover
After the scanning finished, you are allowed to preview all lost data in the scan result. Just click the categories on the top side one by one. Selectively mark which files you want to recover, then click “Recover” to quickly restore and save them on your computer.

Notes: If you only want to get deleted files back, please check box “Only display deleted items” to list deleted files only. It can help you save your time and you can easily restore the deleted files.
If the “Only display deleted items” option is grayed out, it means that you can only backup existing files in that section. Nothing can be recovered there.
If you don’t have any backup files,please read Guide 2
Guide 2: Directly scan and extract data from iPhone without iTunes backup
Step 1: Connect iPhone with computer and start to scan
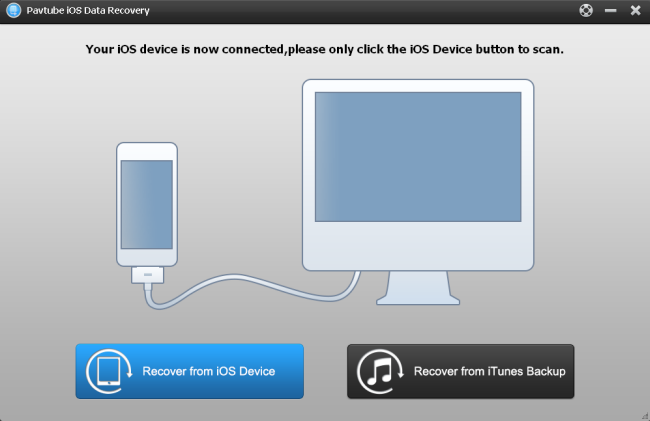
Connect your iPhone to PC after running the iPhone Data recovery software. Then select the “Recover from iOS Device” to start the iOS data recovery job.

Step 2. Start to scan your iPhone
This powerful software will automatically scan your iPhone to find out and analyze all the existing and deleted files. The scan time depends on the number of the files on your iPhone. Please wait patiently until the software finish the scanning task.

Step 3: Preview and recover iPhone lost data selectively
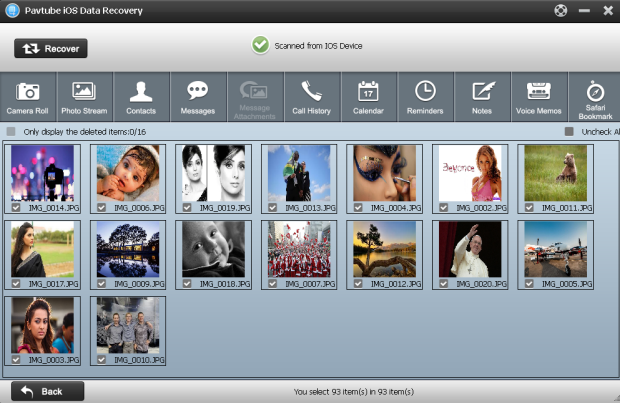
You can easily preview all data found on your iPhone in the scan result. Click the categories on the top side of the window like camera roll, contacts, messages, etc. click “recover” to save all the files on your computer.

Notes: If you only want to restore a few of them, please check box “Uncheck all” to deselect all the files, then preview and mark what you want and click “recover” to save them on your computer.
Related Article:
- Pavtube iOS Data Recovery Is Released Being The Great Help For iPhone, iPad, & iPod
- Recover data from iPad without iTunes backup
- How to retrieve lost or deleted data from iPhone 5?
- Getting back accidently deleted photo from iPhone 5 on Mac
- How to recover lost/deleted data on your iPhone 5C


Leave a Reply
You must be logged in to post a comment.